
The NCP blog
Why Concrete Crack Repair Methods Matter Before Epoxy
Polished concreteUpdated 8 min read
How to repair hairline and wide cracks in concrete before an epoxy coating, and the tools and fillers to use.
Cracks and other flaws in the slab are where a coating tends to show trouble first. ICRI, the International Concrete Repair Institute, lists bond failure, delamination, cracking and failure that needs reapplication as the results of improper surface preparation, so a flaw left in the slab is a flaw the new floor has to carry.
Surface preparation has a large say in how long a floor coating stays bonded. When applying protective coatings, every millimeter matters. Unaddressed gaps or irregularities create weak points that spread under pressure, like hidden fault lines waiting to fracture your smooth finish.
Proper groundwork does more than prevent visible damage. It gives the coating a sound surface to bond to and keeps weak spots from showing through the finished floor, whatever the traffic or temperature changes the room sees.
Trusted professionals use specialized techniques to seal vulnerabilities before application. This critical step preserves both function and aesthetics, ensuring your space maintains its polished appearance through years of use.
Introduction to Concrete Crack Repair
Your driveway’s thin lines or basement floor’s jagged patterns tell a story. These imperfections form naturally as materials expand, contract, and settle over time. Addressing them properly helps your surfaces stay functional and visually appealing.
Understanding Common Concrete Flaws
Surface imperfections range from barely visible hairline cracks to gaping fissures. How a crack is repaired depends on how wide it is, how deep it goes, and whether it is still moving. ACI's field guide to crack repair says the cause of the damage must be assessed and corrected first, and that an epoxy repair may not be applicable if the crack is subject to further movement. Interior spaces with stable temperatures might not need immediate attention unless cracks actively widen.
Typical causes include drying shrinkage, thermal contraction or expansion, and settlement, which ACI's field guide lists among the more typical causes of concrete cracking. A crack’s pattern can hint at its cause, but the cause has to be assessed before you choose a repair.
The Goals of a Lasting Repair
Effective solutions do more than fill gaps. They block moisture intrusion, halt further splitting, and restore load-bearing capacity. Properly treated surfaces become stable bases for protective coatings or decorative finishes.
Successful interventions match materials to crack characteristics. Flexible sealants work for dynamic joints, while rigid compounds suit static fractures. This tailored approach prevents recurring issues and maintains structural integrity through seasonal changes.
The Impact of Unrepaired Concrete Cracks
Unaddressed fractures in your surfaces act like ticking time bombs. Left unattended, they silently escalate into costly structural nightmares that threaten both property value and personal safety.
Structural Integrity and Safety Concerns
Water seeps into openings during rainstorms, then freezes and expands. This cycle widens existing gaps while creating new stress points. Over time, minor surface flaws can grow into deeper cracks.
Reinforcement bars rust when exposed to moisture, and rust takes up more room than the steel it forms from. This pressure fractures surrounding materials, accelerating decay. High-traffic zones become tripping hazards as uneven surfaces develop.
Three critical risks emerge from neglected damage:
- Corroded steel supports reducing structural stability
- Spreading fractures that compromise entire slabs
- Mold growth from persistent moisture intrusion
Commercial properties face amplified dangers. Heavy equipment vibrations worsen existing weaknesses, while chemical spills penetrate unprotected surfaces. Residential spaces are not immune, and a crack that keeps widening in a basement or garage slab is worth having assessed.
Timely intervention prevents localized issues from becoming systemic failures. An assessment before repair looks at why the crack formed and whether it is still moving, so the repair plan addresses the cause as well as the visible flaw, as ACI's field guide advises.
Why Concrete Crack Repair Methods Matter Before Epoxy
A flawless foundation is not just about looks. In ICRI's guidance for coating applications, surface preparation is intended to maximize adhesion. Without addressing imperfections, even premium materials can fail to bond correctly, leading to peeling and bubbling.
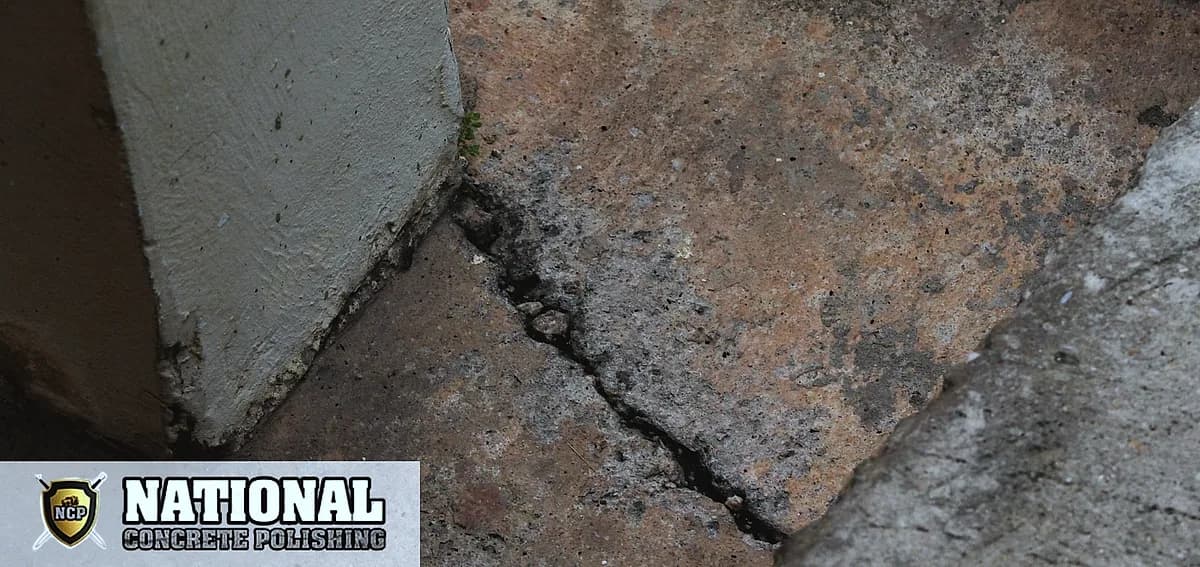
Seamless Results Start Below
Every smooth, glossy floor begins with meticulous groundwork. Cracks left unfilled create stress points that can split a coating under pressure. Professionals use diamond grinders to level substrates, ensuring uniform material distribution across the entire area.
Primers penetrate the pores of the concrete and give the coating something to grip. For high-traffic areas, technicians apply multiple layers to reinforce vulnerable edges and corners.
Investing in quality prep work pays dividends. Spaces withstand forklift traffic, temperature swings, and chemical spills when coatings fuse completely with the base. How long the floor lasts still depends on the system, the traffic and the upkeep.
Techniques for Repairing Hairline and Wide Cracks
Choosing the right approach stops minor flaws from becoming major headaches. Let’s explore solutions tailored to different gap sizes.
Methods for Fixing Hairline Cracks
Narrow cracks need precision sealing. Clean the gap thoroughly before application, removing debris with compressed air or a wire brush, then fill or seal it with a material suited to the crack and to the coating that will go over it. A rigid epoxy repair may not be applicable if the crack is still moving.
Apply sealant in steady strokes using a caulk gun. Smooth the surface with a putty knife for flush integration. This method prevents water infiltration while maintaining the surface’s original appearance.
Approaches to Repair Wider, Gaping Cracks
Wider cracks need more than a surface seal. They are cleaned out and filled to depth with a repair material chosen for that crack, and the filler is left to cure fully before anything goes on top.
Follow the repair product's data sheet for how deep and how full to fill the crack. Epoxy-based and polyurethane-based compounds are both used, and the right one depends on what caused the crack and whether it is still moving.
Epoxy or Polyurethane for the Crack
Before picking a material, find out why the crack formed. ACI's field guide to epoxy injection says the cause of the damage must be assessed and corrected first. It also says epoxy injection can restore structural integrity and reduce moisture penetration, but that an epoxy repair may not be applicable if the crack is subject to further movement. When the crack does not compromise the structure, the same guide says injecting polyurethane grouts or other nonstructural materials may be a more suitable choice.
Cracks caused by corroding reinforcing steel are the exception. The guide says they should not be repaired by epoxy injection, because continuing corrosion will cause new cracks to appear.
Step-by-Step Preparation Process
Proper surface prep separates temporary fixes from lasting ones. Your success hinges on creating ideal bonding conditions through systematic cleaning and shaping. This foundation determines how well materials adhere and perform over time.

Cleaning and Surface Preparation Essentials
Start by clearing loose particles from the affected area. Use a stiff wire brush to scrub out dust, dirt, and crumbling material. For stubborn debris, compressed air blasts particles from deep within gaps.
Next, address hidden contaminants. Degrease the entire surface using industrial cleaners that break down oil residues. Rinse thoroughly and let dry completely before proceeding.
| Tool | Purpose | Effectiveness | Usage Tip |
|---|---|---|---|
| Wire brush | Debris removal | Particle clearance | Scrub in crosshatch pattern |
| Angle grinder | Edge shaping | Shapes the crack edges | Use diamond wheel attachment |
| Vacuum system | Dust extraction | Cleanliness | Clean the filter as the vacuum manufacturer directs |
Grinding transforms irregular edges into uniform bonding surfaces. Grinding turns ragged crack edges into a sound surface the filler can bond to. Always work from the center outward, maintaining consistent pressure.
Final inspection separates adequate prep from exceptional results. Run your glove across the area. If it comes away clean, you’re ready. This meticulous process ensures repair materials bond flawlessly, creating seamless integration with existing surfaces.
Essential Tools and Materials for Concrete Repair
What separates a DIY patch job from professional-grade results? The answer lies in your toolkit. Having the right equipment transforms temporary fixes into lasting solutions that withstand weather changes and heavy use.
Recommended Equipment for Grinding and Cleaning
Start with a concrete grinder to level uneven surfaces. This powerhouse tool removes old coatings and creates optimal bonding textures. Pair it with:
- Chisel and hammer for chipping loose material
- Stiff wire brushes for deep groove cleaning
- Shop vacuum with HEPA filtration
Safety gear proves non-negotiable. Grinding concrete creates respirable crystalline silica dust, which OSHA regulates in its construction silica standard. Wear eye protection and heavy-duty gloves, and use a grinder with dust collection or water as the standard's Table 1 describes.
Selecting Quality Repair Materials
Repair materials come in a few families, and the data sheet for each one sets its cure time and where it can be used.
Choose repair materials that the coating manufacturer approves for the system going on top, and check the compatibility information on the data sheet, since some materials bond poorly to certain substrates. Store products as the data sheet directs.
Detailed Repair Process with Epoxy and Fillers
Mastering the mix ensures your repair stands the test of time. Proper techniques turn basic materials into resilient solutions that withstand daily wear. Let’s break down the critical phases for achieving seamless, long-lasting results.
Mixing and Applying Epoxy-Based Repair Solutions
Start by combining the two-part repair material in the ratio on its data sheet. Stir until the mixture reaches uniform color and consistency; the data sheet gives the mixing time. Pour slowly into prepared gaps, using a putty knife to eliminate air pockets.
Work in small sections for optimal control. Overfill cracks slightly to account for settling. Smooth the surface with a trowel while the material is still workable. This creates flush transitions between old and new materials.
Curing Process and Finishing Touches
Allow the full cure time on the product's data sheet, which depends on the product, the temperature and the humidity. Avoid foot traffic during this phase, since even slight pressure can dent uncured fillers.
Final sanding creates feather-edged perfection. Match existing textures using coarse-grit paper for industrial floors or fine-grit for smooth coatings. Your renewed surface now supports protective layers or decorative finishes without compromise.
Frequently Asked Questions
How does surface preparation affect epoxy adhesion?
Proper cleaning and grinding remove debris, oils, and loose material, creating a rough texture for epoxy to bond securely. Skipping this step risks peeling or delamination over time.
What risks come from ignoring small cracks in slabs?
Untreated flaws allow water infiltration, leading to freeze-thaw damage, rusted rebar, or uneven settling. Over years, this weakens structural integrity and compromises safety.
Can filler products fix both hairline and wide gaps effectively?
Not with one product. Match the material to how wide and deep the crack is and whether it is still moving. Patching compounds are used for larger voids.
Why use a grinder during surface preparation?
Grinding opens pores in the surrounding concrete, removes weak layers, and ensures repair products adhere tightly. It’s critical for long-lasting results on floors or driveways.
How long should curing take before applying a sealer?
Cure time depends on the product: one epoxy crack filler's data sheet lists 2 to 7 days to full cure at 70°F, so follow the manufacturer’s data sheet for yours. Rushing this step can cause premature wear or bonding failures in high-traffic areas.
Are wire brushes sufficient for cleaning joints before repairs?
Wire brushes remove loose particles, but combine them with vacuuming and degreasers for thorough results. Contaminants left behind weaken the bond of patching materials.
What tools ensure smooth finish work after filling cracks?
Trowels level the material flush with the slab, while edgers create clean lines. For coatings, use rollers designed for epoxy to avoid bubbles and uneven application.
Written by

Founder and CEO
Chris Lavin is an esteemed leader in concrete polishing and epoxy coatings with a distinguished 20-year career. As founder and CEO of National Concrete Polishing and owner of Xtreme Polishing Systems, he's renowned for polishing and epoxy coating more floors than anyone globally. Chris is recognized for his innovative approach and commitment to enhancing floor durability and aesthetics. His hands-on experience and technical proficiency make him a respected authority and a valuable resource in the field of floor polishing and coatings.
Same topic
Related articles
All stories
Residential7 min read
Polished Concrete Garage Floor vs Epoxy: Pros and Cons
This process smooths the surface, and a densifier hardens it, so polished concrete is used in high-traffic areas.
Read it
Polished concrete11 min read
Can You Polish Old Concrete? Transform Your Floors Today
Old concrete floors often hide tremendous potential beneath their weathered, dull surfaces.
Read it
Cost & ROI11 min read
How Much Does It Cost To Polish Concrete Floors?
Choosing polished concrete flooring for your residential or commercial space is a no-brainer these days.
Read it
Tell us about the floor
Tell us the space and roughly how big it is.We come back with what it would cost and when we could start.
Prefer to talk? Call +1 844-876-5474
- Leads@
nationalconcretepolishing.net - 2200 NW 32nd St #600,
Pompano Beach, FL 33069 Mon to Fri, 9:00 to 5:30