Over time concrete driveways develop cracks, stains, and surface imperfections due to various factors like weather exposure, heavy traffic, and general wear and tear. Concrete driveways typically last between 20 and 50 years, Concrete driveway resurfacing is necessary to ensure longevity and maintain the durability and aesthetics of concrete driveways.
Resurfacing a concrete driveway follows a series of processes that start with assessing the damage done to the driveway and end with applying the resurfacing material. These steps demand a level of expertise that most homeowners do not have
What is Concrete resurfacing?
Concrete resurfacing is the process of laying a new thin layer of concrete over an existing concrete driveway to cover the blemishes and correct functional issues. It is a cost-effective solution to rejuvenate the appearance and structural integrity of a concrete driveway without the need for a complete overhaul.
The resurfacing material, usually a concrete mix, is applied thinly over the existing concrete after proper preparation. This new layer adheres to the old, damaged surface, providing a fresh, smooth, and durable finish.
However, resurfacing a concrete driveway not only improves the appearance of the concrete surface but also enhances its strength and resistance to various environmental factors such as abrasion weathering, and chemical abrasion.
How to Resurface Concrete Driveways
Resurfacing driveways follows a stepwise approach and each step is important for achieving professional results with minimal hassle and expense. Here are the steps to follow:
1. Assessment and Preparation
The first step in the resurfacing process is to thoroughly assess the condition of the concrete driveway. Look for cracks, uneven areas, stains, or any other damage that needs repair. Take note of these areas and ensure the driveway does not require more than a simple resurfacing.
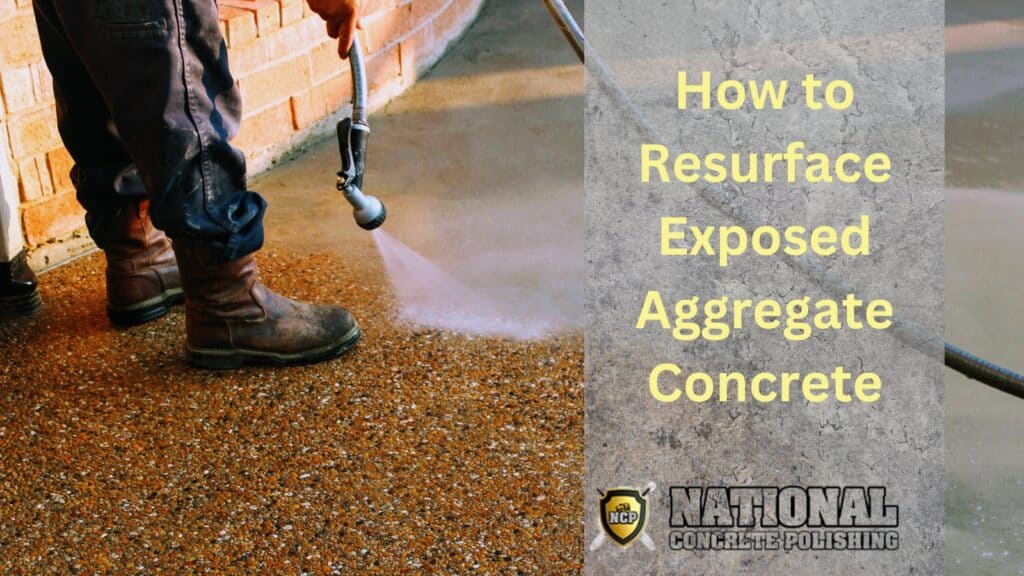
2. Surface Cleaning
Once the assessment is complete, clean the damaged driveway to remove debris and dirt. For DIY enthusiasts, a broom and some foamy water remove most of the dirt. Professional concrete contractors use pressure washers to ensure a more efficient and thorough cleaning process.
When cleaning the driveway pay attention to cracks and mark them for filling. Clean out all loose material from the surface.
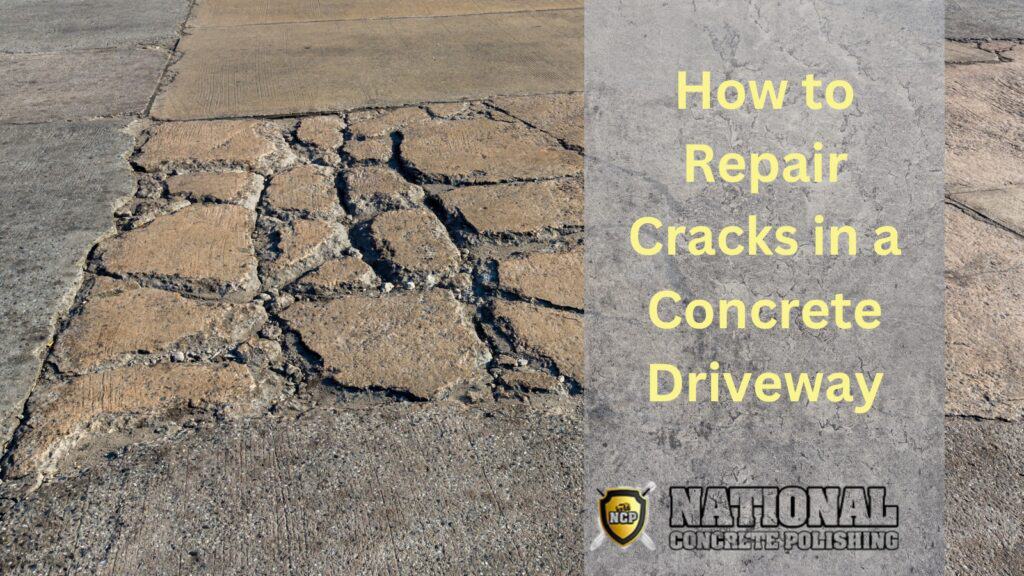
3. Repairing Cracks and Damages
Fill any cracks or holes in the driveway using a concrete patching compound or crack filler. Follow the manufacturer’s instructions for application and drying times. Do not ignore small cracks as they tend to get bigger. Smooth the patched areas with a trowel to ensure they are level with the surrounding surface. Repairing the cracks prepares the driveway for the next step.
4. Etching or Grinding
To promote better adhesion of the resurfacing material, etch the surface of the concrete driveway using an etching solution or mechanically grind it with a diamond grinder. This step helps remove any remaining contaminants and creates a rough texture for the new overlay to bond to.
5. Mixing Resurfacing Material
Once etching is completed, prepare the resurfacing material. Resurfacing materials come as either a pre-mixed solution or dry powder. Follow the steps below to properly mix the resurfacing material:
- Pour mixing water into a bucket big enough to hold adequate water for the basement to be resurfaced. Stir with a mixer or a power drill.
- Slowly pour the resurfacing material while stirring until a lump-free mixture is obtained.
- Ensure the mixture has the proper consistency for application – typically similar to pancake batter.
The mixing tool of choice is a paddle mixer as power drills tend to create lumps. Hand-mixing the material is also not a good idea.
6. Applying Resurfacing Material
Begin applying the resurfacing material to the driveway using a long-handled squeegee or concrete trowel. Work in small one-square-foot sections, and spread the material evenly before moving on to the next section. Ensure consistent thickness across the surface and pay attention to edges and corners to ensure uniform coverage.
7. Smoothing and Finishing
Once the resurfacing material is applied, smooth and level the surface with a concrete trowel. Work quickly to blend each section smoothly before it begins to set. Apply a non-slip finish to prevent a slick driveway on rainy days.
Use a concrete broom and sweep in the same direction and at the same speed to get a consistent finish. For a decorative finish, consider using stamping tools or textured rollers to create patterns and textures.
8. Curing and Protection
The newly resurfaced concrete driveway takes about 24-48 hours to dry. During this time, protect the surface from foot traffic, vehicles, and moisture to ensure proper curing and durability.
9. Sealing The Concrete Overlay
Once the driveway is dry enough, apply a concrete sealer to prevent fading and stains. Sealers also serve as extra protection against the freeze-thaw cycles that concrete driveways are susceptible to. Follow the manufacturer’s guidelines while using sealers.
Extras
For better visual appeal, apply an epoxy coating to the resurfaced concrete driveway. Epoxy is also a functional option as it is resistant to some of the chemicals and weathering factors that concrete is susceptible to. However, applying epoxy requires professional help. Do not attempt without a professional close by.
When Does a Concrete Resurfacing Become Necessary?
Concrete resurfacing becomes necessary when damage to the driveway starts to affect aesthetics and functionality. The following are a few telltale signs that a concrete driveway requires resurfacing:
- The presence of large or deep cracks.
- The presence of potholes
- The presence of surface discoloration that does not disappear after deep cleaning.
- The driveway is chipping away.
- Rainwater does not run off the surface.
Ignoring a driveway that clearly needs resurfacing could lead to standing water seeping underground, leading to water seepage in basements. However, care must be taken to ensure a resurfacing project is not done on a driveway that needs complete removal and replacement, In most cases, expert advice is required.
Who Can Resurface Concretes?
Concrete driveway resurfacing is typically done by professional concrete contractors. However, various individuals or entities can carry out the project depending on the complexity of the project, skill level, and personal preferences.
Can I resurface my concrete driveway myself?
Yes, concrete driveway resurfacing can be a DIY project if you have the necessary skills and tools. However, for best results, it’s recommended to hire a professional contractor, especially for larger or more complex projects.
How long does concrete driveway resurfacing last?
The lifespan of a resurfaced concrete driveway depends on factors such as the quality of materials used, proper surface preparation, and maintenance. With proper care and maintenance, a resurfaced driveway can last for several years.
Can I resurface a concrete driveway with cracks?
Yes, concrete driveway resurfacing can effectively hide minor cracks and surface imperfections. However, it’s essential to repair any significant structural cracks or damage before resurfacing to ensure a durable and long-lasting result.
How soon can I drive on a newly resurfaced concrete driveway?
Allow the resurfaced driveway to cure for at least 24 to 48 hours before allowing foot traffic and a minimum of seven days before driving on it. Follow the manufacturer’s recommendations for specific curing times based on the resurfacing material used.

Share This Post