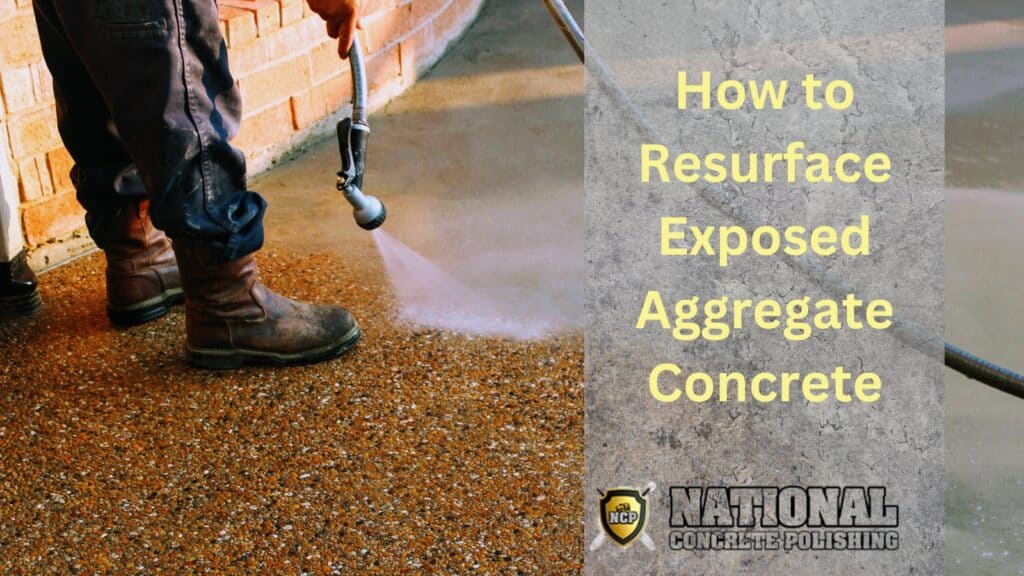
Dull or weathered exposed aggregate can make your entire outdoor area seem worn out. You may wonder, how do you resurface exposed aggregate to bring back its aesthetic appeal? This guide breaks down how to resurface exposed aggregate concrete: preparing your surface, applying a new layer, and sealing for endurance.
Exposed aggregate concrete, with its unique blend of natural stones and aggregates, creates a visually appealing and textured surface that adds character to driveways, patios, and walkways. However, over time, exposure to the elements and regular use can cause wear and tear, resulting in cracks, stains, and a dull appearance. By resurfacing your exposed aggregate concrete, you can bring back its original charm while strengthening its structure.
What is Exposed Aggregate Resurfacing?
Exposed aggregate resurfacing is like a fountain of youth for your concrete surfaces. It involves applying a new surface layer to the existing concrete, not only enhancing its appearance but also increasing its durability. Think of it as a facelift, a rejuvenation that revives the aesthetic appeal of your concrete while retaining its unique texture.
Resurfacing isn’t just about beauty; it’s also practical. It eliminates the need for a complete replacement, which can be costly and time-consuming. It’s about longevity, safeguarding your exposed aggregate surfaces from wear and harsh weather conditions, and improving resistance to cracking and discoloration.
Exposed aggregate resurfacing involves applying a new layer of material over the existing exposed aggregate surface to rejuvenate its look and functionality. The resurfacing material can be a specialized concrete overlay or a specifically formulated coating designed for this purpose. The new layer covers the existing aggregate, providing a fresh surface with improved aesthetics and durability.
The process typically begins with an assessment of the condition of the existing exposed aggregate concrete. This evaluation helps identify any cracks, stains, or areas in need of repair. Once identified, necessary repairs and cleaning are conducted to prepare the surface for resurfacing.
The resurfacing material is then applied to the prepared surface, often using trowels or specialized tools. The material is spread evenly to achieve a consistent thickness and texture. Depending on the desired outcome, additional techniques such as stamping or texturing may be employed to create unique patterns or finishes.
After the resurfacing material is applied, it undergoes a curing process. This allows the material to harden and strengthen, ensuring its longevity and durability. The curing time can vary depending on the specific product used and environmental conditions.
Exposed aggregate resurfacing offers several benefits. It can transform weathered and worn-out surfaces into fresh, visually appealing areas. The new layer also provides added protection against further damage, such as cracks and stains. Additionally, resurfacing can help improve the overall functionality and safety of the surface.
Whether it’s a driveway, patio, or walkway, exposed aggregate resurfacing allows you to breathe new life into your existing concrete surfaces, enhancing their aesthetic appeal and extending their lifespan.
Benefits of Exposed Aggregate Concrete

Exposed aggregate concrete offers several benefits that make it a popular choice for various applications. Here are some advantages of exposed aggregate concrete:
1. Aesthetic Appeal
Exposed aggregate concrete showcases the natural beauty of aggregates and stones, creating a visually captivating surface. The exposed aggregates come in various colors, shapes, and sizes, allowing for customization and complementing the surrounding environment. The texture and depth of the exposed stones add depth and character to driveways, patios, and walkways, making them visually appealing and unique.
2. Slip Resistance
One of the significant advantages of exposed aggregate concrete is its superior slip resistance. The exposed stones or aggregates provide a textured surface that enhances traction, especially compared to smooth or polished concrete. The rough texture enhances grip, reducing the risk of slips and falls, particularly in wet or icy conditions. This makes exposed aggregate concrete an excellent choice for areas where safety is a concern, such as pool decks or sloped surfaces.
3. Durability
Exposed aggregate concrete is highly durable and can withstand heavy traffic and harsh weather conditions. The strong bond between the aggregates and the concrete matrix contributes to its strength and longevity. The aggregates act as a protective layer, reducing the visibility of surface scratches, scuffs, and signs of wear. This durability makes exposed aggregate concrete suitable for high-use areas like driveways and commercial walkways.
4. Low Maintenance
Exposed aggregate concrete requires minimal maintenance, making it a practical choice for homeowners. The textured surface helps to hide dirt, dust, and stains, reducing the need for frequent cleaning. Regular sweeping and occasional pressure washing is usually sufficient to keep the surface looking fresh and well-maintained.
5. Temperature Regulation
Exposed aggregate concrete offers excellent temperature regulation properties. The concrete’s ability to absorb and store heat during the day and release it slowly at night creates a thermal mass effect. This effect helps regulate temperatures in outdoor areas, making them more comfortable during hot summers or cooler evenings.
How to Prepare for a Successful Resurface
Preparing exposed aggregate concrete for resurfacing is a crucial step toward achieving a durable and visually appealing result. Proper preparation ensures optimal adhesion and longevity of the resurfaced surface. Here’s a walkthrough of the essential steps to effectively prepare your exposed aggregate concrete for a successful resurfacing project.
1. Assessing the Current Condition
Before you embark on resurfacing, it’s vital to assess the current condition of your concrete. Look for visible damage such as cracks, blisters, or flaking. These indicate the presence of unsound concrete that needs attention before resurfacing can proceed.
It’s not enough to depend on visual inspection alone. Tapping the surface with a hammer and observing the bounce back can help assess the concrete’s soundness. For cracks, a depth evaluation using a crack width ruler is essential to measure their severity. Damaged areas and cracks need to be repaired and allowed to set before the resurfacing can commence.
2. Cleaning the Surface
Once you’ve assessed the condition and addressed any damage, the next step is to clean the surface. A clean surface is crucial for effective adhesion of the resurfacing material. A power washer, particularly one with heating elements and higher pressure settings, is ideal for this task.
Pretreating stains with specific cleaning agents is essential for heavily contaminated areas before conducting pressure washing. Stubborn oil stains and tire marks can be addressed using a combination of high-pressure hot water and a commercial-grade degreaser. For smaller, stubborn stains, a poultice made with a powerful solvent can be effective. A methodical, section-by-section cleaning approach ensures a thorough clean, essential for the longevity and durability of the resurfaced surface.
3. Ensuring a Dry Workspace
Now, onto the third preparation step: ensuring a completely dry workspace. It might appear trivial, yet it’s critical to the success of your resurfacing project. The air temperature should remain above 50°F for 24 hours before and after the project to ensure proper drying of the concrete. High humidity can prevent proper drying and should be avoided.
How do you confirm if your concrete surface is sufficiently dry? Moisture meters or plastic sheet tests can help you determine this. Additionally, ensuring that water freely drains from the slab’s surface can prevent potential issues such as vapor pressure expansion. Covering the resurfacing area also aids in keeping the workspace dry, protecting it from environmental moisture.
How to Resurface Exposed Aggregate Concrete

With the preparation out of the way, it’s time to learn the resurfacing process itself. This is a multi-step process that requires careful attention to detail, but when done right, the results are nothing short of transformative.
Let’s walk through these steps on the floor.
1. Applying the Overlay Mix
The first step in the resurfacing process is applying the overlay mix. The mix includes a combination of:
- Cement
- Sand
- Special polymers
- The right proportion of aggregate
These special polymers act like glue, ensuring the mixture binds effectively to the existing smooth surface for a durable, abrasion-resistant texture.
The overlay mix is applied as a thin skim coat, filling in the areas between stones in the exposed aggregate surface to achieve a smoother finish. After the first coat dries completely, which can take 2-4 hours or longer depending on conditions, a second coat may be applied for floors with significant damage.
2. Smoothing It Out
With the overlay mix applied, it’s time to smooth it out. A squeegee can be employed to apply the overlay mix evenly across the concrete, providing consistent coverage and aiding in smoothness.
Proper smoothing of the overlay mix immediately after application is crucial for reducing the later necessity for extensive sanding. For areas that require additional smoothing after the overlay mix has dried, a rub brick can be utilized to sand the surface for a smoother final finish.
3. Curing Time Is Key
Curing is where the concrete gains strength and durability. It’s a process that extends around a month, with certain milestones indicating partial readiness for traffic.
Maintaining the curing concrete between 50 and 85 degrees Fahrenheit is crucial for proper hydration and strength development, especially during hot weather. Be aware that environmental conditions can significantly affect the curing time of the overlay mix.
Once cured, the newly patched aggregate concrete surface needs at least 24-48 hours before it can bear foot or vehicle traffic.
4. Grinding for Perfection
Next up is grinding. An angle grinder equipped with a diamond cup wheel is used to precisely grind down the surface for the final smoothing of exposed aggregate concrete.
Consistent movement with the angle grinder is necessary to avoid surface gouging and to maintain a uniform finish throughout the exposed aggregate. The same angle grinder, when used gently, can expose the decorative stones within the new surface layer. Remember, safety is paramount here as this process involves handling hazardous materials and operating powerful grinding equipment.
5. Sealing for Longevity
The final step in the resurfacing process is sealing for longevity. Sealing enhances colors and protects against efflorescence, water damage, and oil stains.
When selecting a sealant, consider silicone, urethane, or acrylic-based options that resist yellowing, dry to a thick coat, and are suitable for future reapplications. Always test a small area before the full application of the sealant to ensure the desired protection and appearance are achieved. After sealing, allow the area to cure for at least 48 hours.
How to Maintain Your New Surface
Here’s how to maintain your newly resurfaced concrete surface to ensure that it keeps looking its best:
1. Sweeping
Regularly sweeping the surface with a broom or brush with stiff bristles is essential for keeping your concrete surface clean. This removes loose dirt, leaves, and debris that can accumulate on the surface over time. By sweeping regularly, you prevent these particles from scratching or wearing down the concrete. Start from one end of the surface and work your way across, ensuring that you cover the entire area.
2. Washing
Periodically washing the surface with water helps remove dirt, grime, and other substances that may dull its appearance. Using a garden hose or a pressure washer set to a low setting, spray water evenly across the surface. Start from one end and work your way across, allowing the water to effectively rinse away the dirt. Pay special attention to areas with stains or heavy soiling. Avoid using high-pressure washing as it may damage the surface or dislodge the aggregates.
3. Brush thoroughly
For tough stains, gently brush the wet surface with a hard brush: If you encounter stubborn stains on your concrete surface, it’s important to address them carefully. Start by wetting the stained area with water. Then, using a hard-bristle brush, gently scrub the surface in a circular motion.
The goal is to lift the stain without causing damage to the exposed aggregate. Avoid using harsh chemicals or abrasive cleaners, as these can harm the aggregate or the surface. If the stain persists, consider using a specialized concrete cleaner recommended for the specific stain type.
Taking preventative steps can help preserve the appearance and quality of your concrete surface. For example, ensure that vehicles parked on the surface are not leaking oils or other fluids. These substances can stain the concrete and deteriorate the sealant over time. Promptly address any spills or leaks by cleaning them immediately to minimize the chances of staining. Regularly inspect the surface for any signs of damage or wear and address them promptly to prevent further deterioration.
Should I consider resurfacing my exposed aggregate concrete or replacing it altogether?
If your exposed aggregate concrete has significant damage or structural issues, it may be more practical and cost-effective to replace it altogether. However, if the damage is minor and the concrete is still structurally sound, resurfacing can be a viable option to restore its appearance and functionality. It’s recommended to consult with a professional to assess the condition of your concrete and determine the best course of action.
What can I put over exposed aggregate?
You can put a concrete overlay, stamped concrete, tile or pavers, decorative coatings, or outdoor carpeting over an exposed aggregate concrete surface to achieve a different look or cover the existing surface. These options provide various aesthetics and can be chosen based on your preferences and the desired outcome. It’s recommended to consult with a professional to determine the most suitable option for your specific needs.
What materials do I need to resurface exposed aggregate concrete?
To resurface exposed aggregate concrete, you will need concrete resurfacer/overlay, bonding agent/primer, water, mixing tools (such as a mixing paddle or drill), a trowel or squeegee for application, and any desired tools for texturing or finishing the surface (such as a broom or stamping tools).
Can I change the color or texture of my exposed aggregate concrete during the resurfacing process?
Yes, it is possible to change the color or texture of your exposed aggregate concrete during the resurfacing process. There are various techniques and products available that allow you to achieve different colors and textures for your concrete surface.
For changing the color, you can use concrete stains or dyes that penetrate the surface and provide a new color. These stains or dyes come in a wide range of shades and can be applied during the concrete resurfacing process to achieve the desired color.
Can I resurface only certain areas of my exposed aggregate concrete, or does it need to be done on the entire surface?
Yes, it is possible to resurface only certain areas of your exposed aggregate concrete instead of the entire surface. This flexibility allows you to address specific areas of concern or make targeted improvements while preserving the existing areas that are in good condition.
Resurfacing specific areas can be cost-effective, especially if the damage or wear is localized. It allows you to focus your efforts and resources on the areas that require attention, rather than resurfacing the entire surface.
However, it’s important to note that the appearance and texture of the newly resurfaced areas may differ slightly from the existing exposed aggregate. Achieving a perfect match can be challenging, particularly if there has been significant color variation or aggregate exposure over time.
To ensure a cohesive look, it’s recommended to consult with a professional who can assess the condition of your concrete, guide you on the best approach, and help you determine the most suitable resurfacing options for the specific areas you wish to address.
National Concrete Polishing is available to properly prepare and restore your damaged concrete surfaces. With our expertise and commitment to quality, we can help you achieve outstanding results, ensuring a beautiful and long-lasting finish. Contact National Concrete Polishing for your resurfacing needs and experience the difference we can make.

Share This Post